
DIY: Making a Terrarium.

Terrariums have intrigued me for as long as I can remember. My love for houseplants overshadowed any desire to build my own terrarium until very recently. I’m still houseplant obsessed, nothing has changed there, but an article I read a couple of weeks ago reinvigorated my interest in this nearly 200 year old art. For those of you who are crunched for time, let me just spoil the article for you. The terrarium in question has only ben watered once in 53 years! Low-maintenance on that level is something I can get into in a big way.
First, a little background. Terrariums were all the rage in the Victorian era. They soared in popularity much like Orchids and other houseplants did among the Victorian population. It was in 1842 that a botanist named Nathaniel Bagshaw Ward accidentally invented the first terrarium, an experiment that had slipped his mind and resulted in the happy accident that many of us try to recreate. He realized that maybe there was something to this idea of growing plants in a small, controlled environment, so he pursued it. His efforts were rewarded when the early terrariums were referred to as “Wardian Cases,” in his honor. And the rest is history. In the 178 years since Ward stumbled upon the first terrarium, the art has been refined. We now have terrarium building stations in our local nurseries, and tiny terrarium plants sold in big box stores.
After dabbling a bit myself, I do see what all the fuss is about. Not only is building your own terrarium a fun, creative opportunity, it’s really easy. The whole process took me maybe 20 minutes to assemble, and it would have been even less if I hadn’t been running back to the kitchen every few minutes to get more potting mix. In addition to the ease, this was a very cost efficient project. Several of the items I’m using to build this terrarium were already sitting around my house. I happened to have four glass jars stuffed into various shelving units within my house, and I had some gravel out in my back yard. I was able to use some nice rooted cuttings that had been sitting in propagation jars for ages with no end in sight. I spent less than $20. I bought prepackaged, terrarium ready charcoal and moss bundles for $2 each, and tiny plants at 3 for $10. The rest was sitting in my house or backyard. If you don’t have gravel or glass jars, never fear. Thrift stores often have glass jars available at very inexpensive prices, and even local grocery stores are starting to carry terrarium glass.
Ingredients:
Glass jar, with or without lid
Gravel
Dried Moss
Horticultural Charcoal
Potting Mix - preferably a light, breathable mixture that will allow drainage without remaining soggy
Plants
Getting Started:
I began by gathering all of my ingredients and settling them out in the order in which I’d be using them.

My jar is in the center, and my ingredients will be going into the jar beginning with the gravel at the top, and heading down from there.

First, in goes the gravel. I used nearly 2 inches of gravel at the bottom of my jar. You’ll notice that the gravel is the most dense ingredient we are using, and it’s at the bottom. This is not intended to catch water and keep it. That system isn’t really effective, at least not the way in the way that many believe. When gravel or rocks are placed at the bottom of a decorative pot with the intention of collecting excess water and holding it away from the soil, it doesn’t exactly work as planned. Despite the varying textures of gravel and potting mix, equilibrium and saturation will be sought amongst these elements. This isn’t great if you’re trying to avoid root rot in a houseplant, but to create a tiny ecosystem inside your terrarium, it’s great. Our goal here is to cycle the moisture in the terrarium much like the water cycle of the earth works - it rains, and water fills into bodies of water where it evaporates, or it falls onto the ground where it saturates the earth. The water is then cycled back into the air where cloud forms develop based on temperature and environment, and the water stays in the air until it falls again. It’s not going to be that involved inside a terrarium, if course, but achieving a moisture flow, including the transpiration from the plants within the terrarium, is ideal. Water has the ability to be a solid, a liquid and a gas (in the form of water vapor - relative humidity, as we know it), and creating this terrarium is just manipulating the many forms that water takes. We won’t be dealing with any ice, hopefully, but with the right levels of moisture, steady temperature and healthy plants, we can manipulate the balance between water as a liquid and a gas, thus sustaining your plants. The bottom line is: add the gravel to your terrarium.

Next, I added the dried moss. This moss is quite fluffy, but with the weight of the other ingredients added on top, it reduced to around an inch of compressed moss. The purpose of the dried moss is to help achieve the balance referenced in the gravel section. The moss will help keep the moisture even, while also working as a barrier that prevents the soil from mixing into the gravel and creating nothing more than a rocky potting mix.
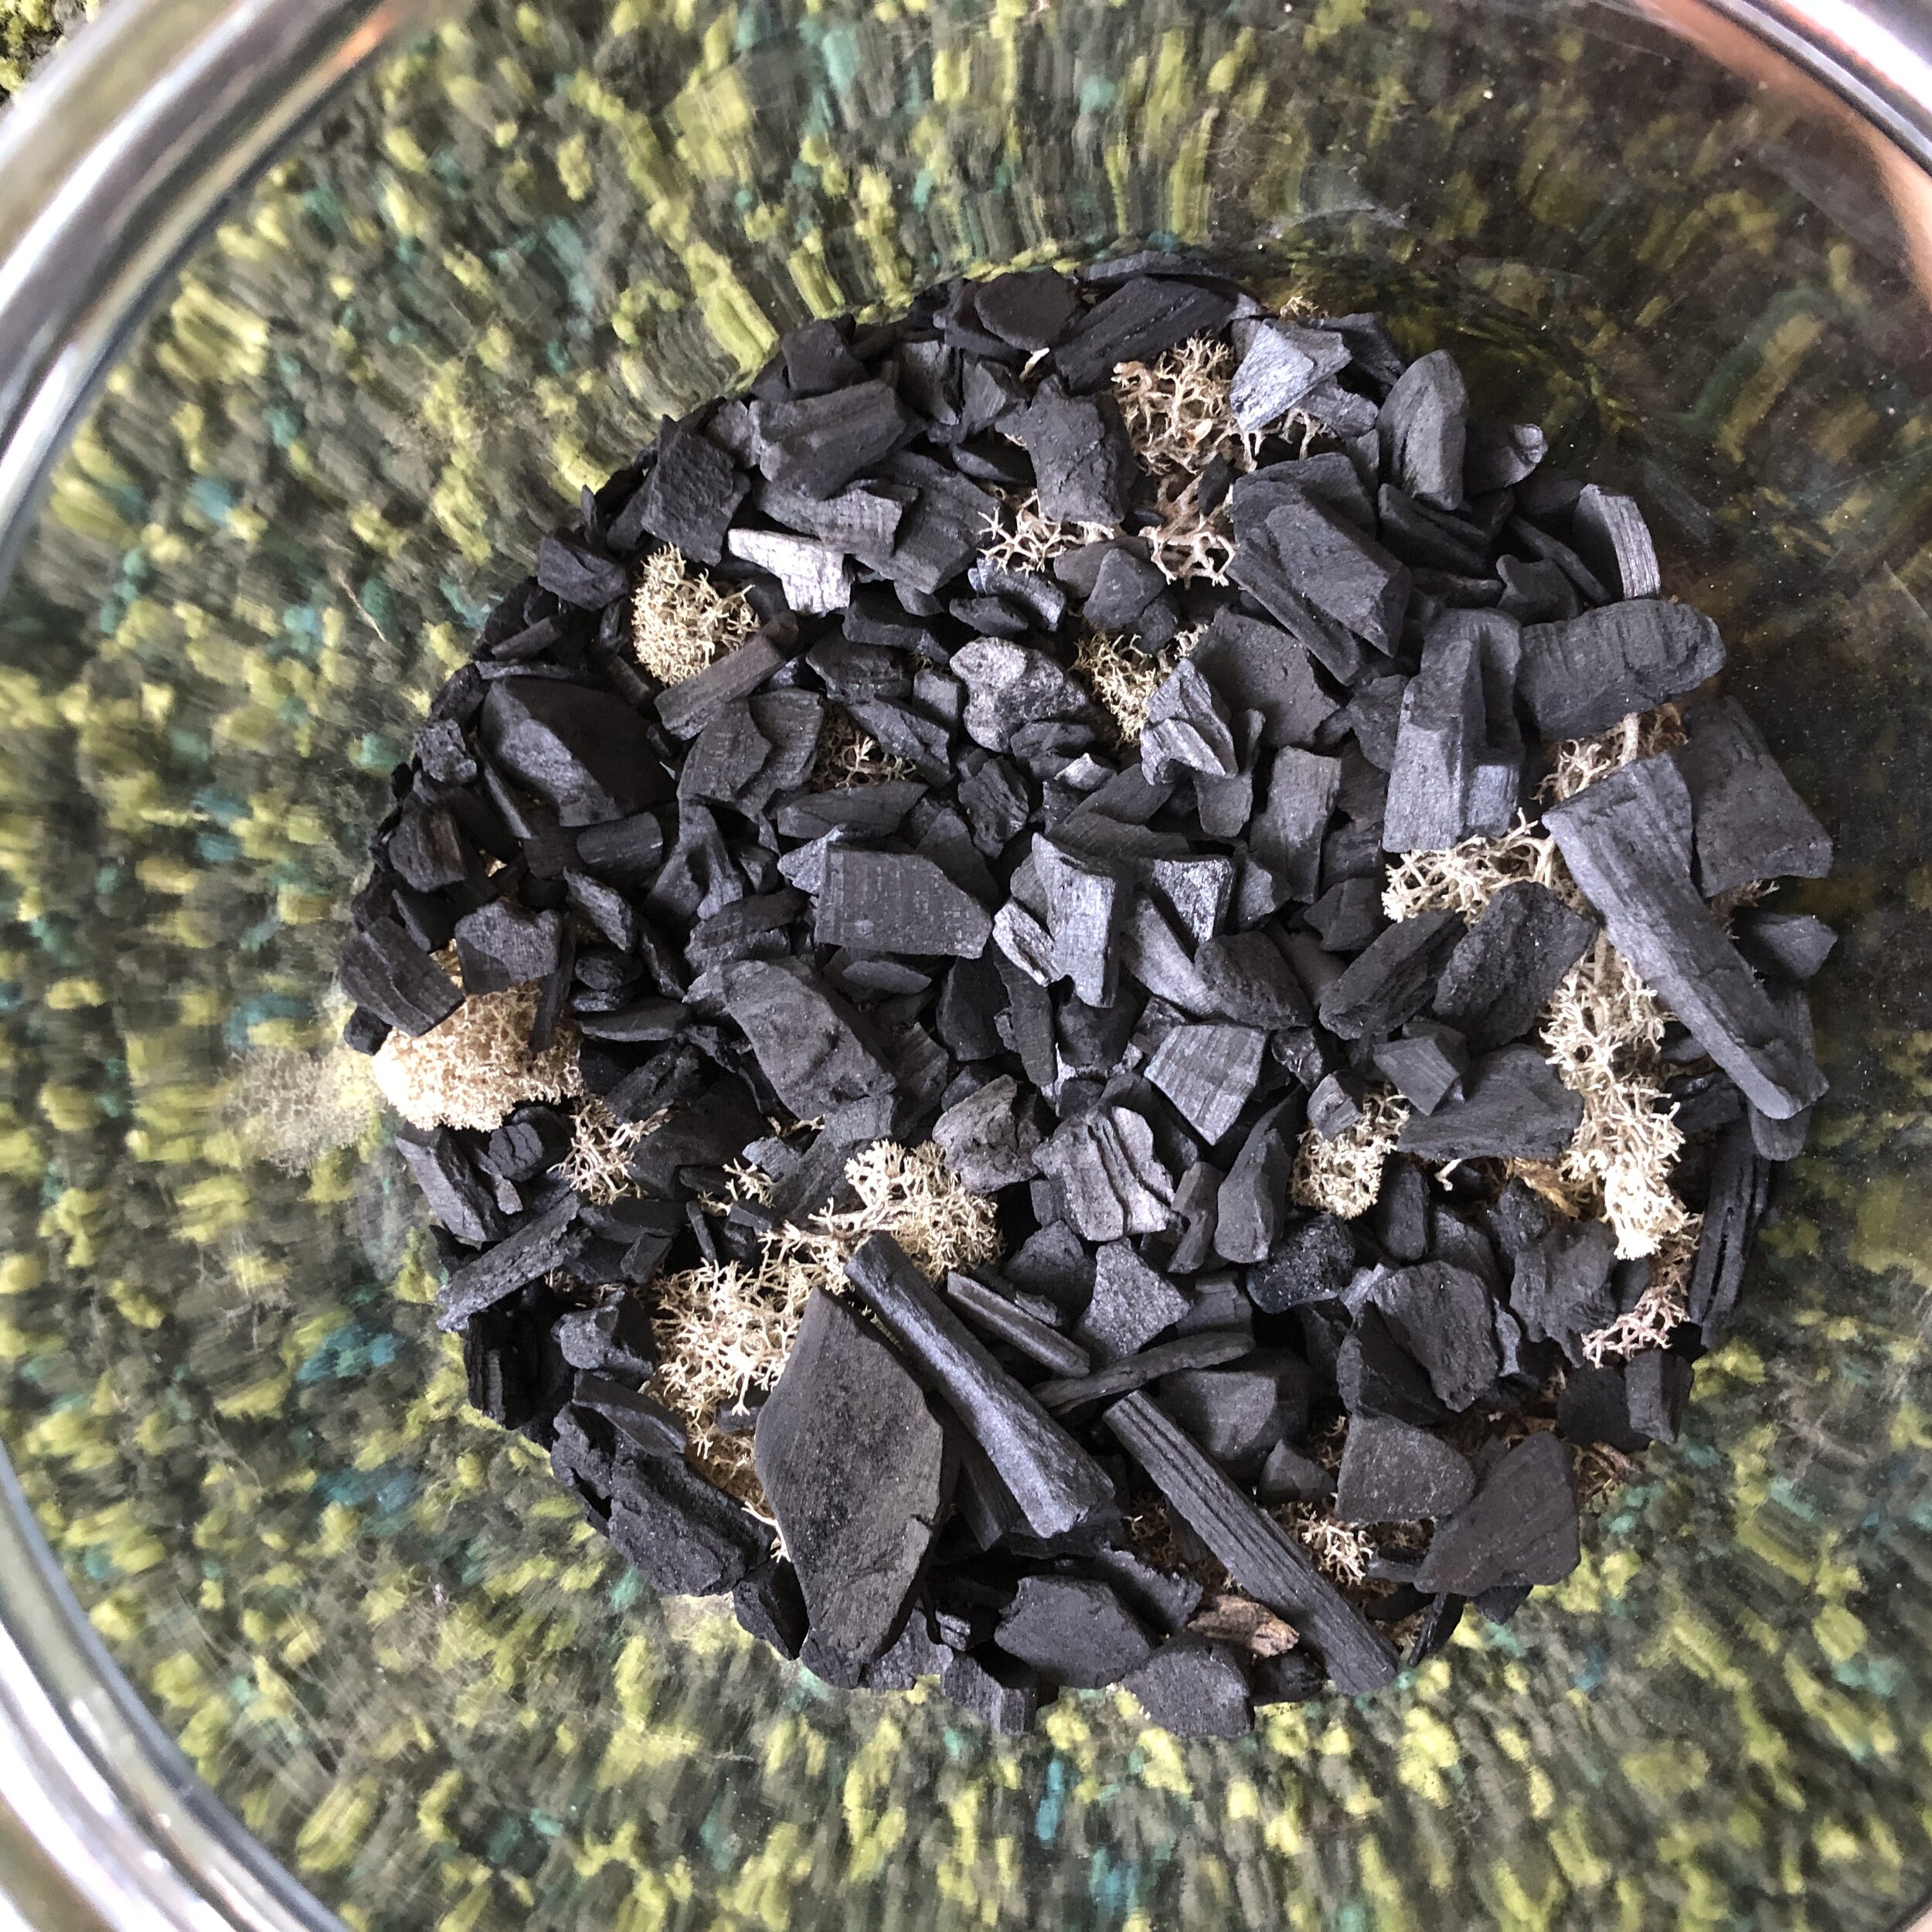
Next, add the horticultural charcoal. Charcoal is amazing, and I use it in many of the potting mixes I make at home. It absorbs water, and then traps the nasty bacteria or fungus that could contaminate your terrarium or potting mix. This is an essential step, otherwise, your warm, moist environment could just become a mold experiment. I did add more charcoal after I took this photo to ensure that there was full coverage of the charcoal layer over the moss layer.
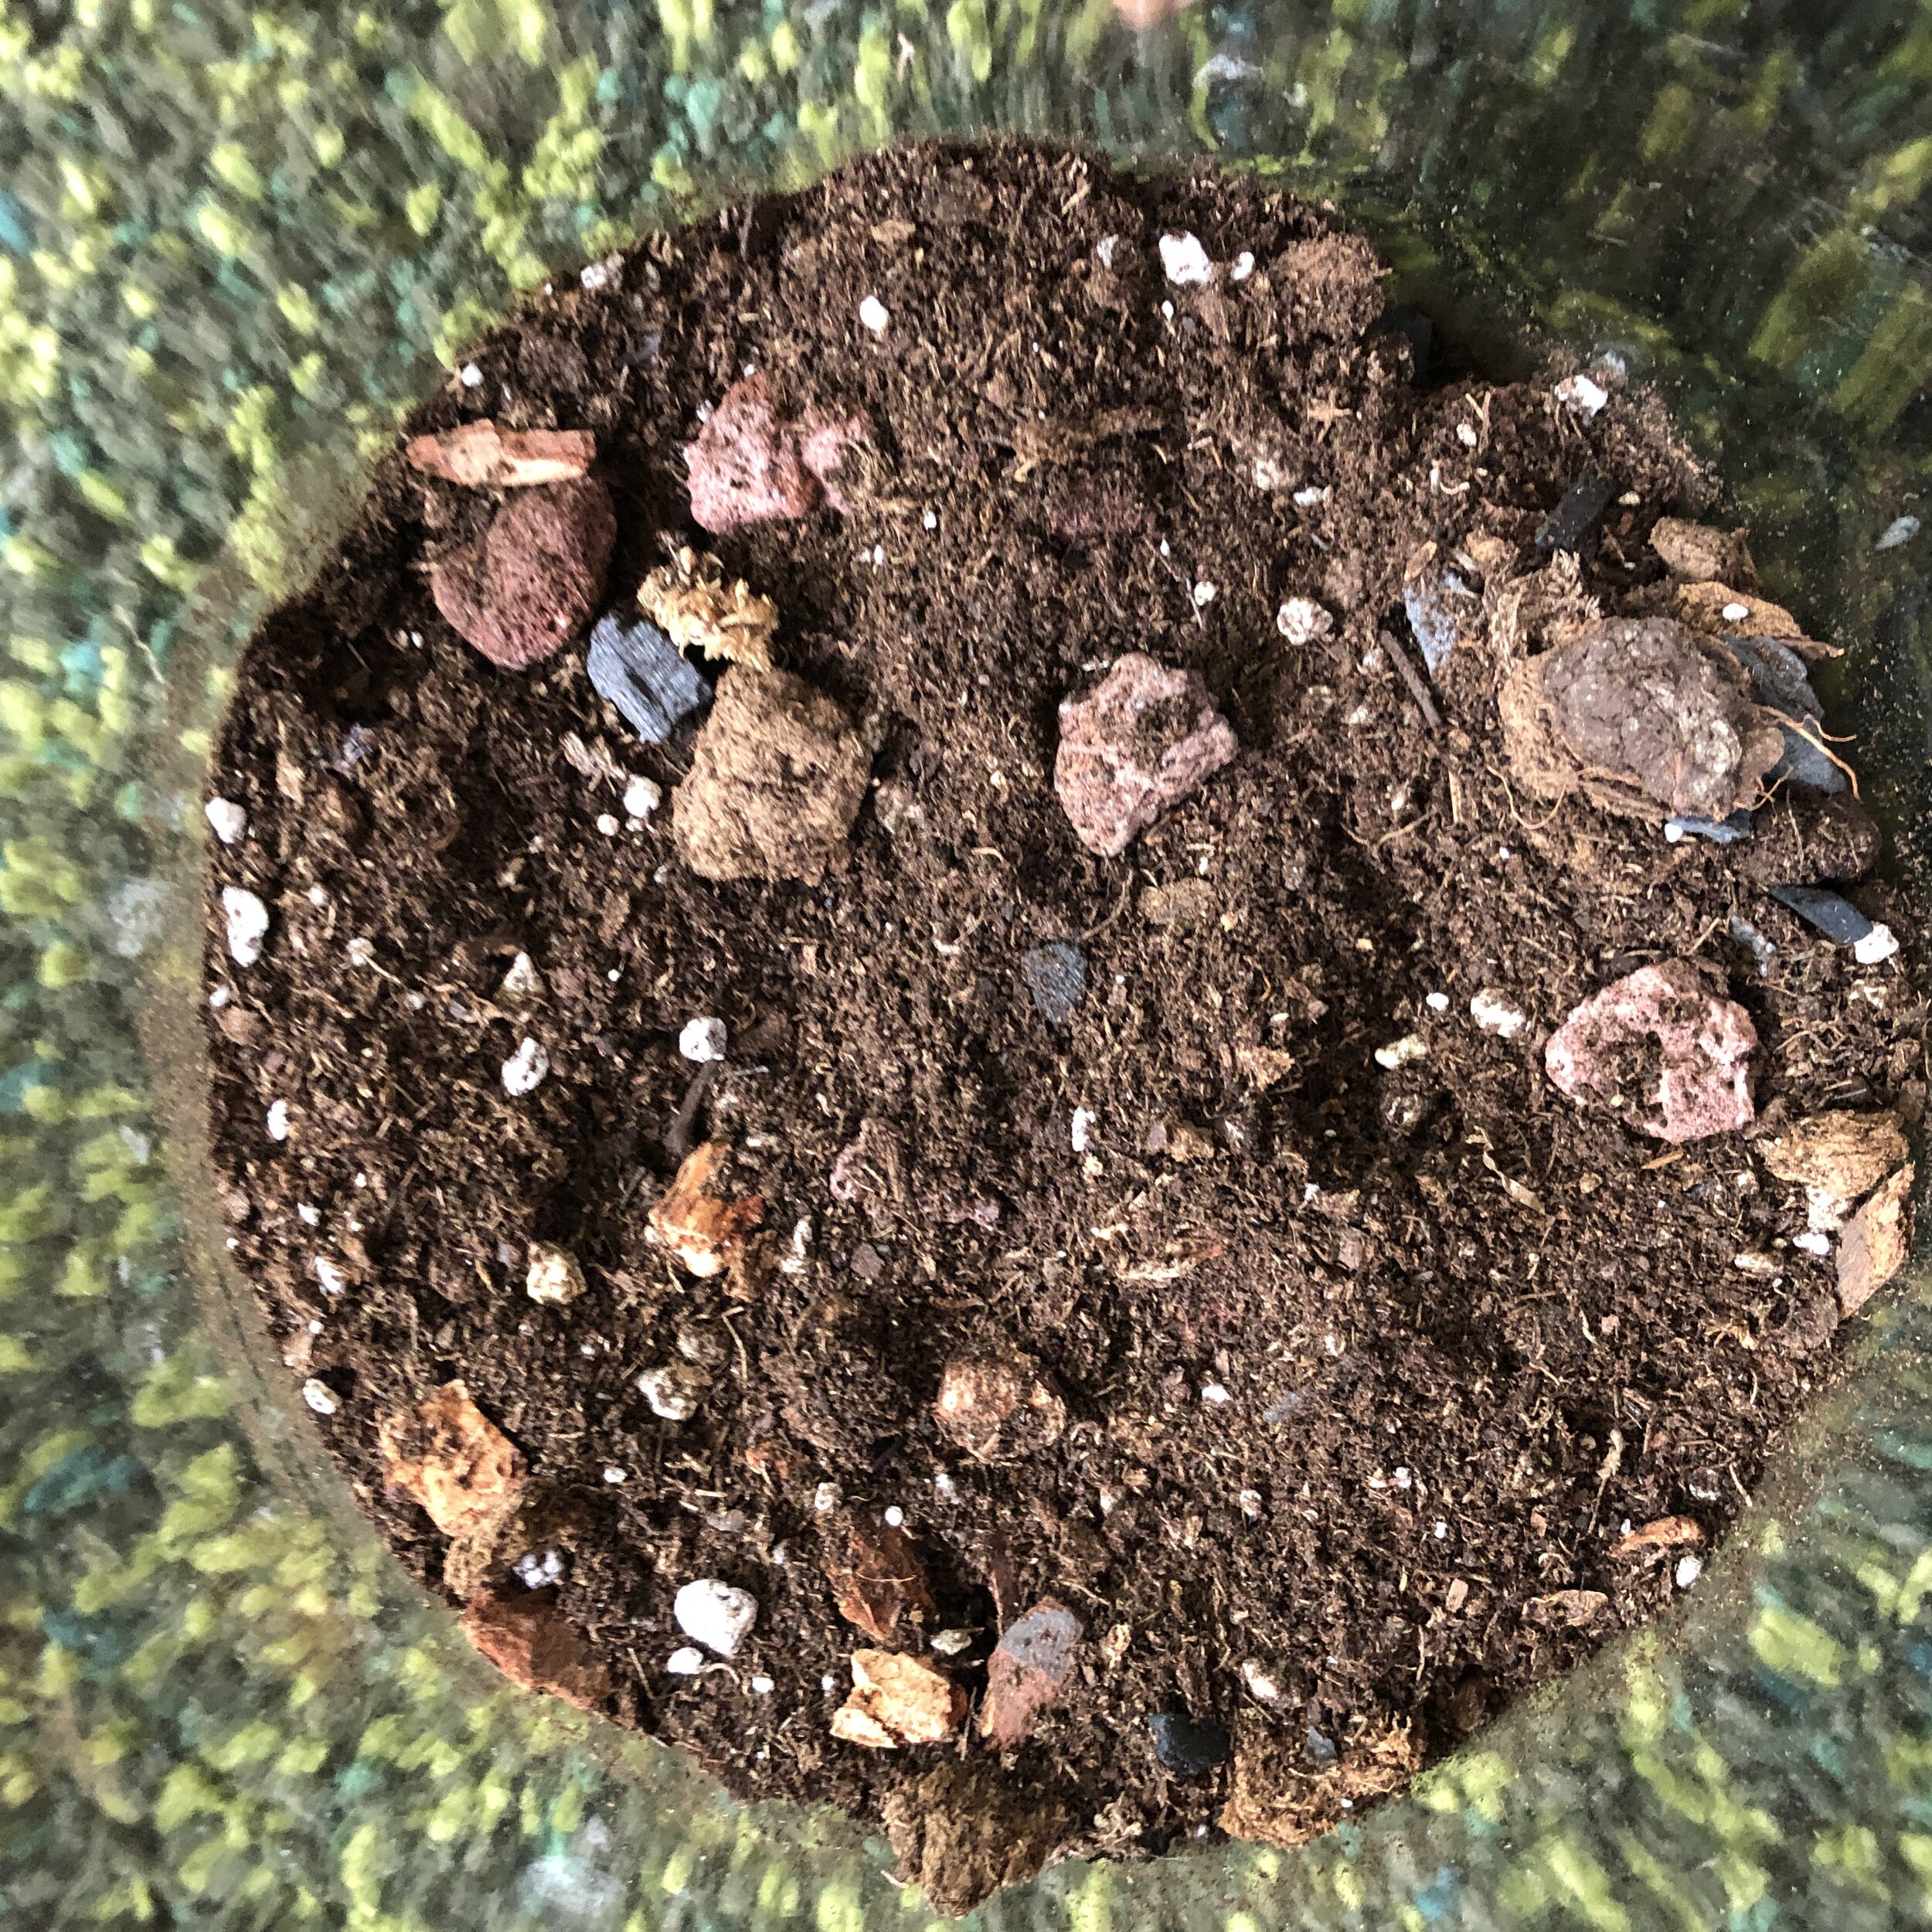
Now add potting mix! I used a general potting mix with added earthworm castings, charcoal, perlite, and a dash of fir bark. The goal here is to go for a mix that will drain well. If your potting mix holds all the moisture indefinitely, your roots could rot.

Here’s a look at the layering before the plants are added.
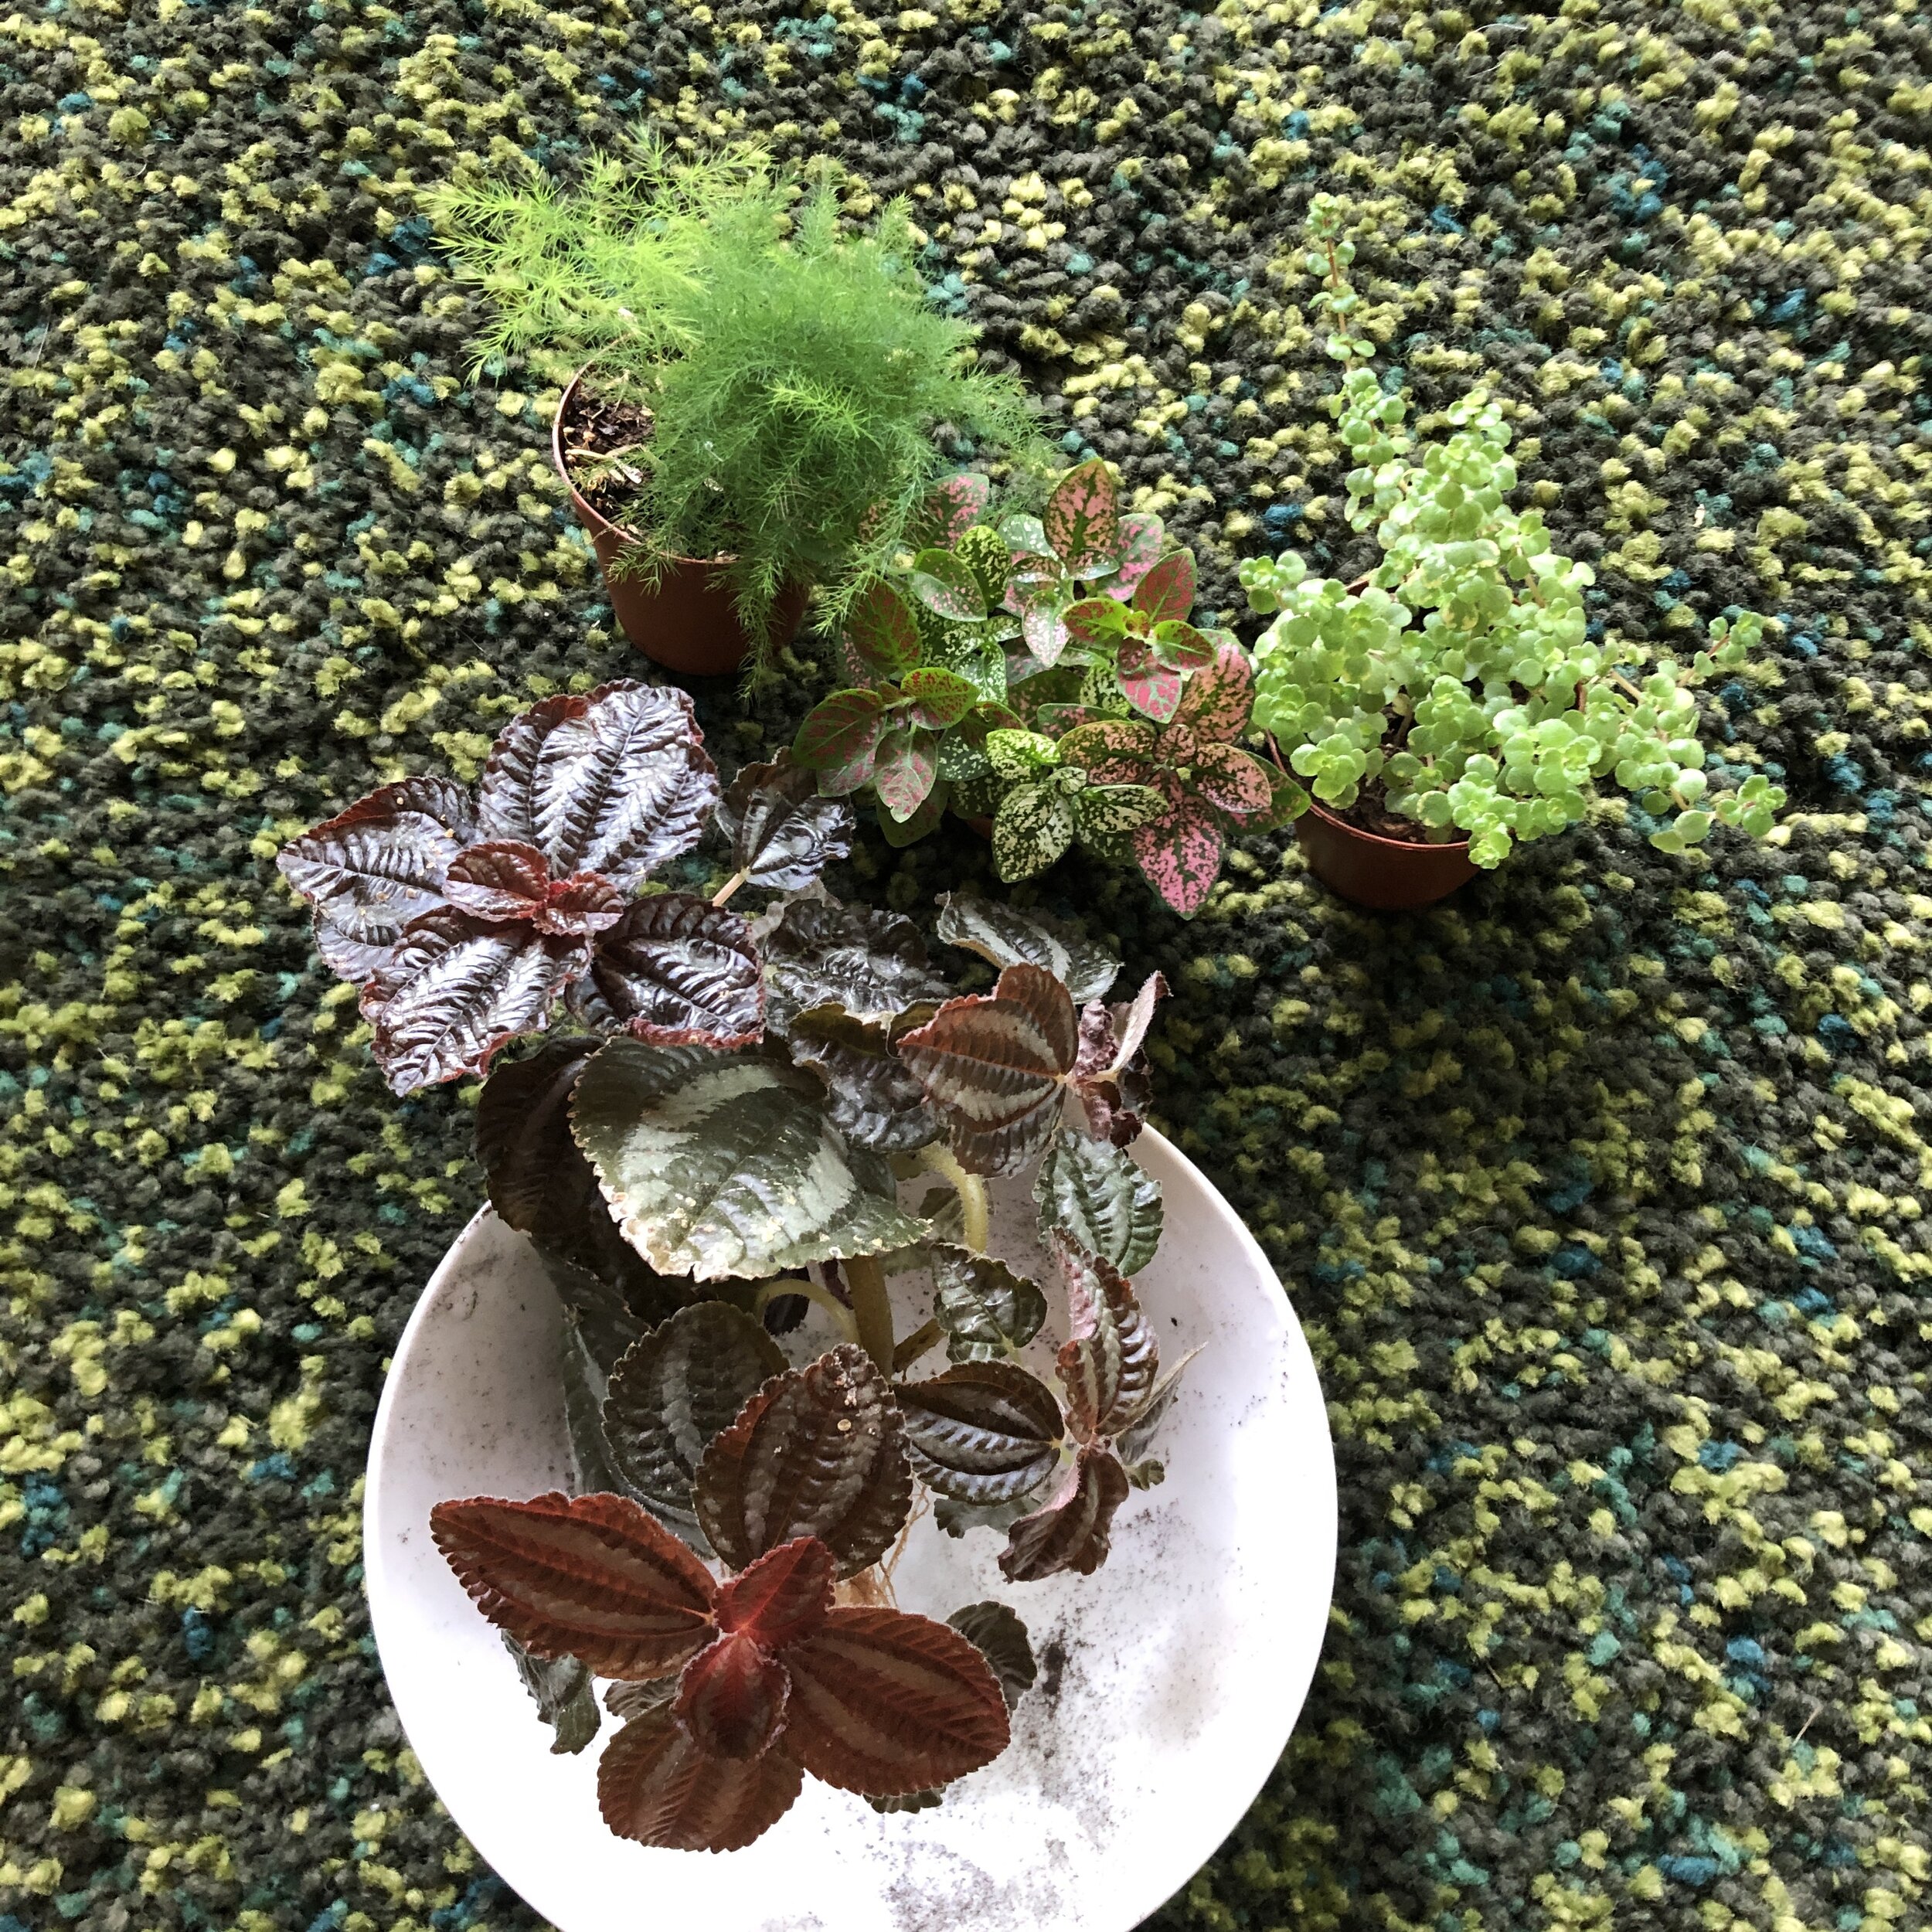
These are the plants I’ll be adding to my terrarium. I have an adorable asparagus fern (Asparagus plumosus), A Polka-dot plant (Hypoestes phyllostachya), a new Pilea (Pilea microphylla), and cuttings of another Pilea (Pilea cadierei “Pan Am”).
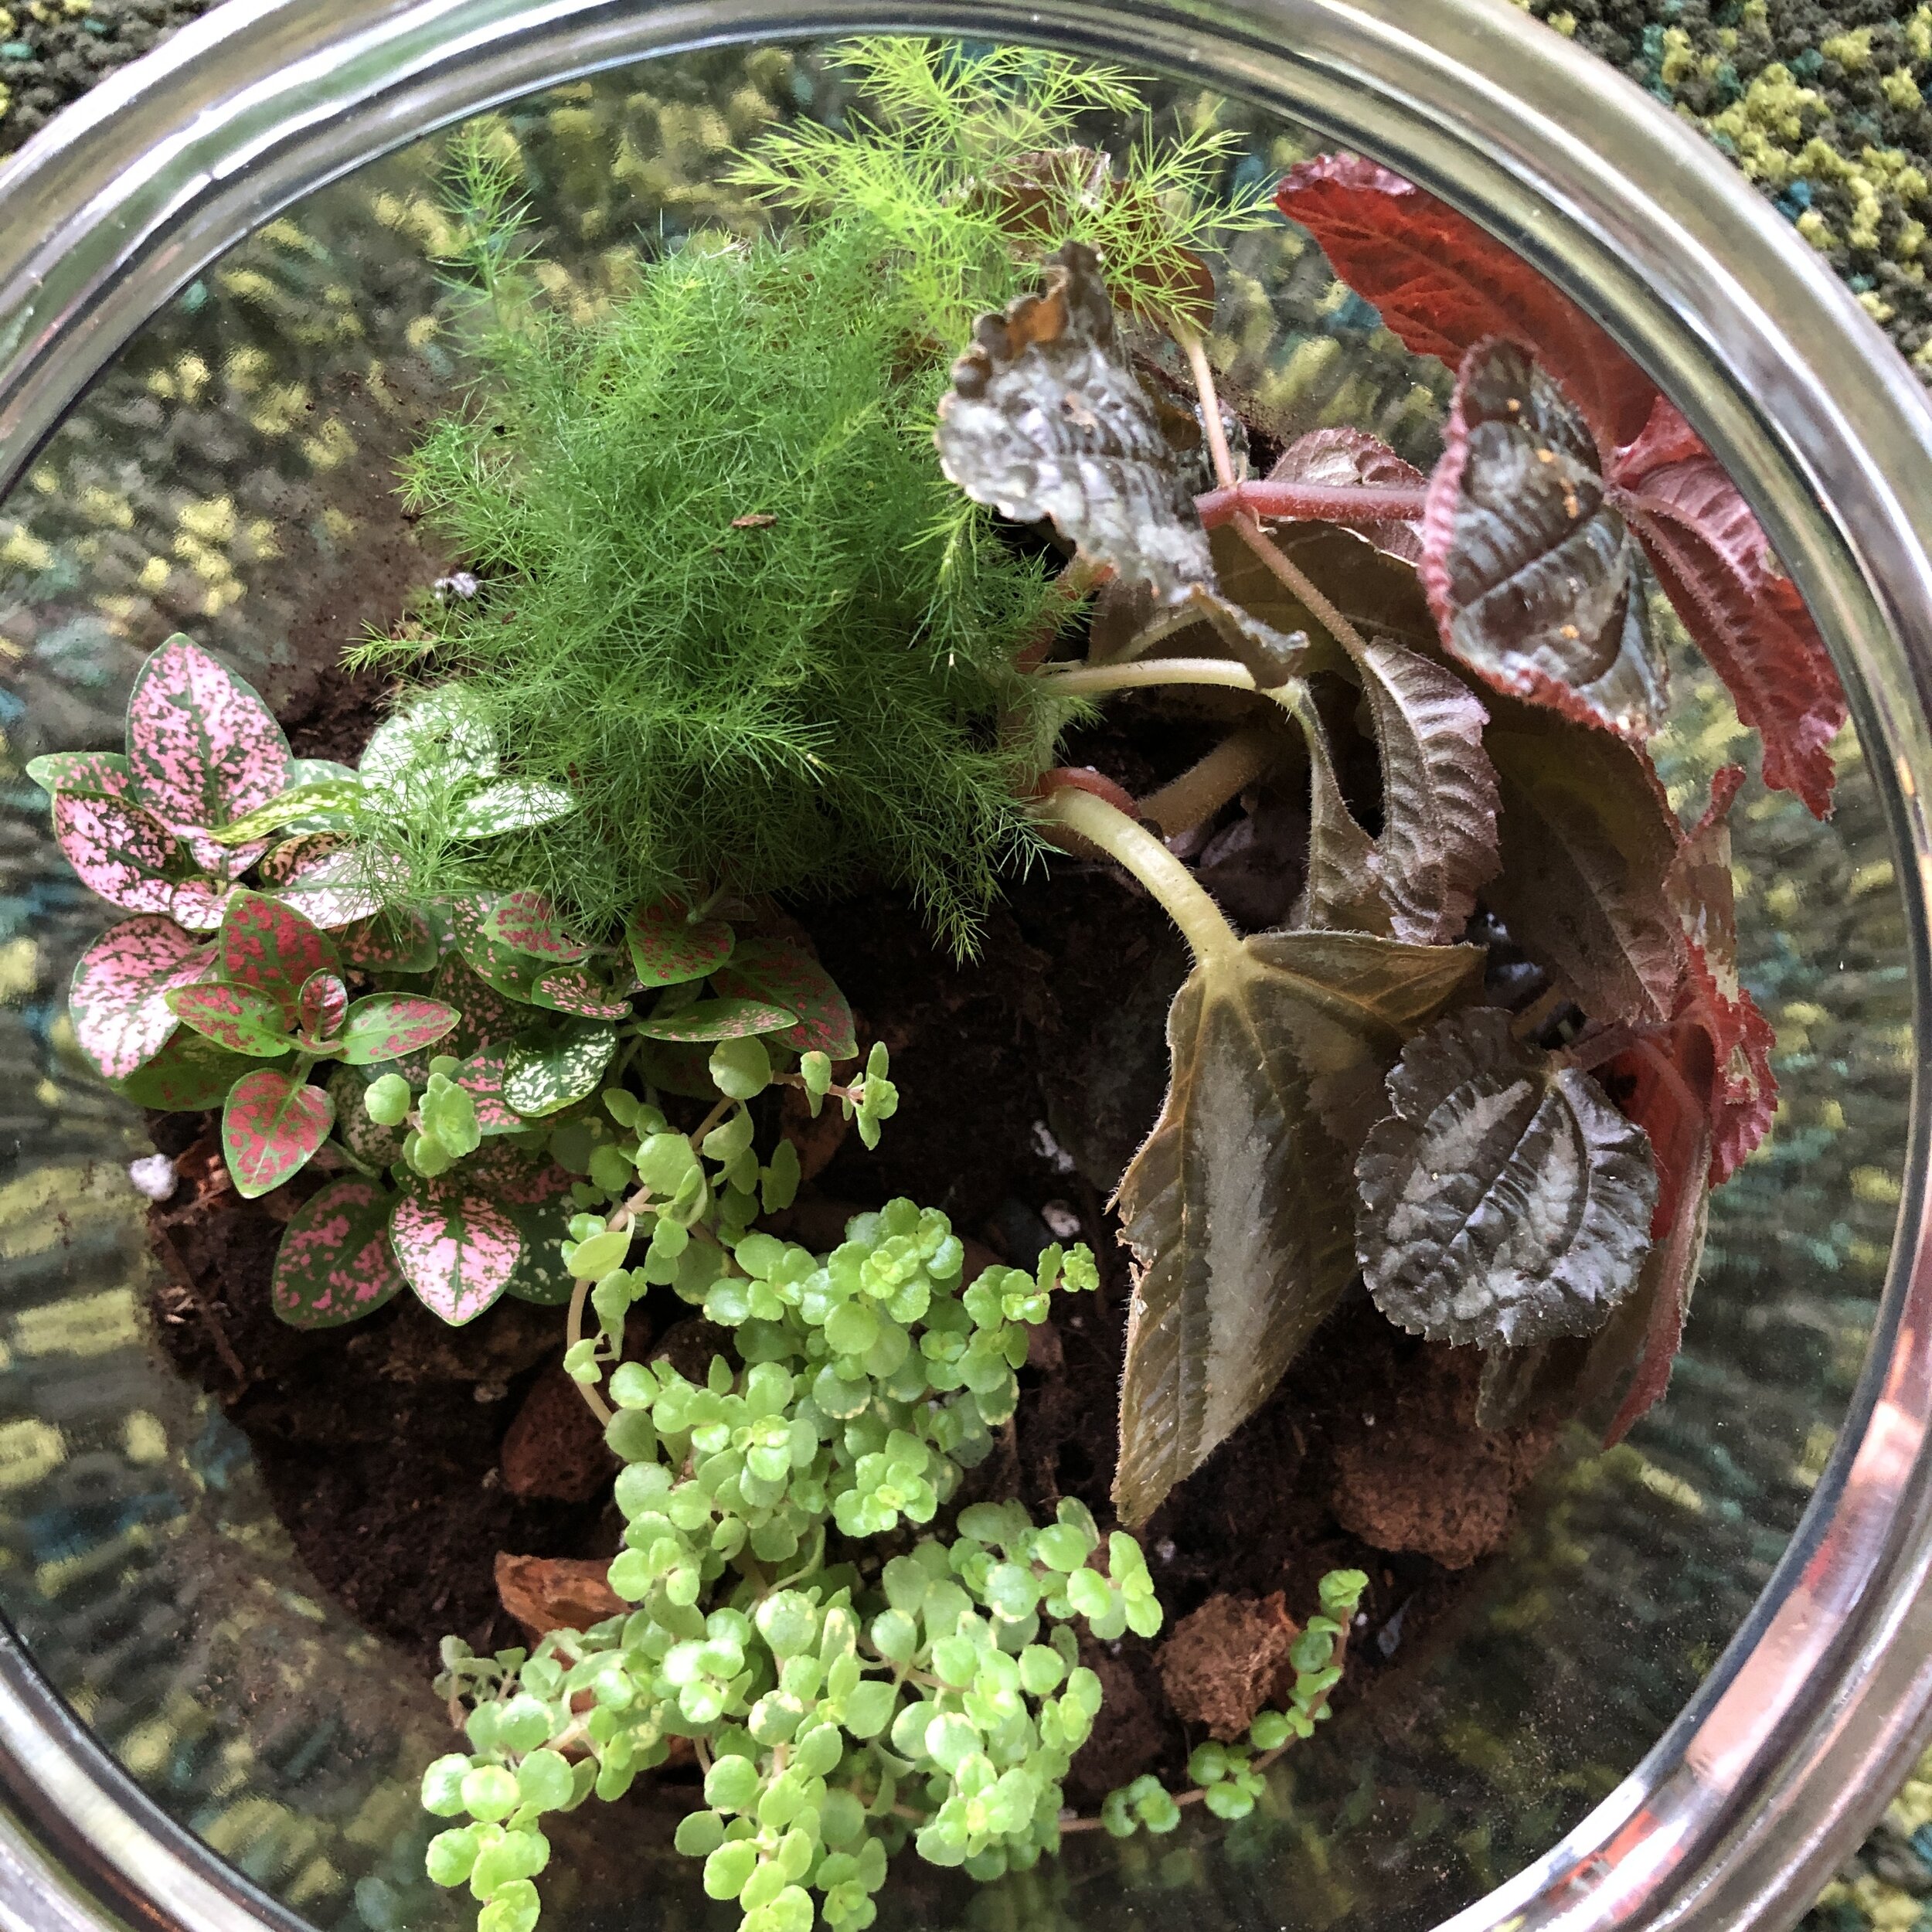
Plant! This is where it comes in handy to have a jar with a wide mouth. Even with my big jar, it was a bit awkward to plant. It’s a good idea to keep your plants away from the glass, if possible. The contact can be damaging or disturbing to some plants and the foliage could die back. I did my best to keep the plants at a safe distance, but I didn’t get too bent out of shape about it. I plant to let the plants get established and then trim them back if necessary. Prior to planting, I waited a few days to be sure all of my plants (besides the cuttings in the prop station) had achieved equal dryness inside their tiny nursery pots. Now that I had thirsty plants in soil, I watered.

It was satisfying to watch the water travel through the different layers. I watered until I could see that the substrates had achieved equal moisture, but I stopped before water began to overtake the gravel at the bottom.

Here is my finished terrarium! You might be able to see that condensation is already starting to build up inside the little ecosystem. I’ll update on this like I do with many of may crazy plant endeavors and let you know how it’s faring.
If you have built your own terrarium, or even better (!!!) you have one that’s thriving, let me know! You can email me here, comment down below, or find me on Instagram for a chat!